Isn’t it great to smell a fresh load of laundry coming out of the dryer? Anyone who has gone through the laborious task of laundering clothes can relate to it. Another annoying aspect of using dryers is the lint buildup. It not only impacts the performance efficiency of the dryer but is extremely dangerous for the entire household.
Whether you have an electric or gas dryer, if it exhausts air outside of your home, you must vent it regularly. Venting the dryer is crucial because it removes the moisture from the clothes so that they don’t grow mildew and rot in hot and humid conditions. Eliminating the possibilities of mold growth is important for the health and safety of you and your family. One simple way is to install a vent to significantly reduce drying time because moist air is flowed out instead of being recycled through the clothes.
This post is all about how to vent a dryer in the middle of the house. You must understand the basics really well in order to do well on this project. Discuss the details with the professionals to get everything right. You can find the best professionals in your area at Topspot 101. It’s as easy as typing your zip code and required category of service providers.
Let us dive into the venting method.
Start By Placing the First Vent Hookup
The optimal way to vent a dryer in the middle of your home without outside access is to run a vent hose through a window. Or you can run a vent hose up through your attic space to a dryer vent located on your roof.
The first step is to identify the initial venting periscope. If conceivable, it is supposed to go through the floor over a previous vent.
In certain cases, things might change a bit. Check by placing the periscope at about a 90-degree point however much as could be anticipated. Then, adjust it to the dryer and see if it fits. Fix it firmly by ensuring the borders are secured.
In case the periscope does not fit, you have no other option but to go to the nearest store and get one that does fit your dryer. You cannot take any risks on fittings.
Install The Next Periscope
Once you have carefully installed the first periscope, it’s time for the next periscope. For that, you need to return to the ground floor. Make sure that the primary periscope is still hanging in its place.
Now get a subsequent part of the periscope and combine both of them. It's best to join the top part finish of the last one and the base finish of the periscope on the dryer.
Seal The Periscope
When the periscopes are hanging in their place, apply splash froth protection to seal the periscope. This will protect your vent when the dryer is operating. Make sure you are choosing good-quality sealant and apply it outwardly instead of within the vent. Recheck the seal to ensure that you do not murder the wind current. Apply it to the outside of the vent rather than within.
Fix The PVC
This could be a little tricky. First, you have to identify the plan of the house. There are two possibilities.
Possibility A
If you own a half-cellar or cellar with adequate space to utilize PVC for driving the air outside the house, this will work for you. The possibility of form and overheating will limit your required framework. Here is how to proceed.
Accurately measure the opening of the secondary periscope. Now connect the PVC and allow it to flow to the initial driving outside completely. There should be approximately 5″- 8″ of cover on the outside for adequate warmth removal. If you want to limit the bugs entering the line, join a lattice or fold to the furthest of the limit of the PVC.
Possibility B
In case your cellar doesn’t approach outside venting, this is for you. Know that you will not be running the PVC outside of the house. You will need about 4″- 6″ of PVC. Situate the part of the PVC in a way that it hangs off of the open base finish of the periscope. If there is enough space, leave a container of water underneath the PVC. It is an easy and cost-effective way to capture the abundance build-up and reduce the risk of fire related to venting.
How Often Should You Clean Dryer Vent?
After you have completed the project, you must keep the vents clean. If you are concerned about the best frequency to follow, we are here to help. According to experts, it is good to have your dryer exhaust vents inspected and cleaned by a trusted professional at least once per year. But if your household uses a dryer very often or you have a lot of children, get it cleaned after every six months.
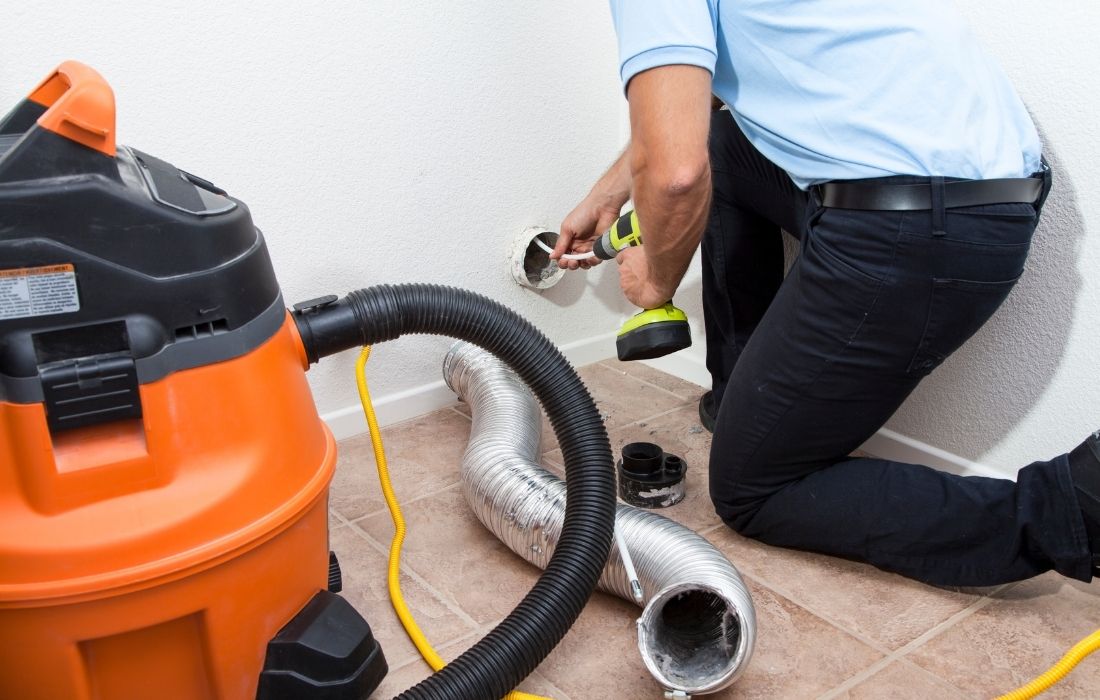
How Can I Clean My Dryer Vent Without Going Up On The Roof?
The first step is to remove the lint with your hands and make sure the hose attachment is directed to the inside of the duct. A lint brush can also come in handy to eliminate the lint accumulated at the opening of the ductwork. Then vacuum deep inside by using the hose extension. In case the vent is very long and goes up to the roof, it's best to use a dryer vent kit.
If any of the above-mentioned work seems too tough for you, it’s safe to find an experienced professional. Visit Topspot101 to find the most competent service providers near you.